Upload Documents and Images
To use an image in a webpage or link to a document (pdf, word, excel or ppt file), you need to upload it to Cascade first. Follow the steps below to upload files:
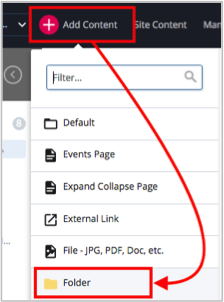
- Locate and click the folder where you wish to upload your files.
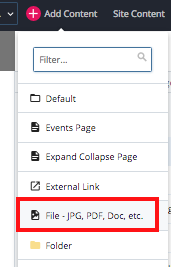
We recommend placing documents in the documents folder and images in the Images folder. You can create one if you don't have it. See Create a New Folder section for instructions. - In Cascade's top header, locate and click Add Content option and select File-JPG, PDF, Doc, etc. option (In the latest version of OGMC templates, you will see a separate asset type for documents and images). This opens a new file form within the main Cascade window.
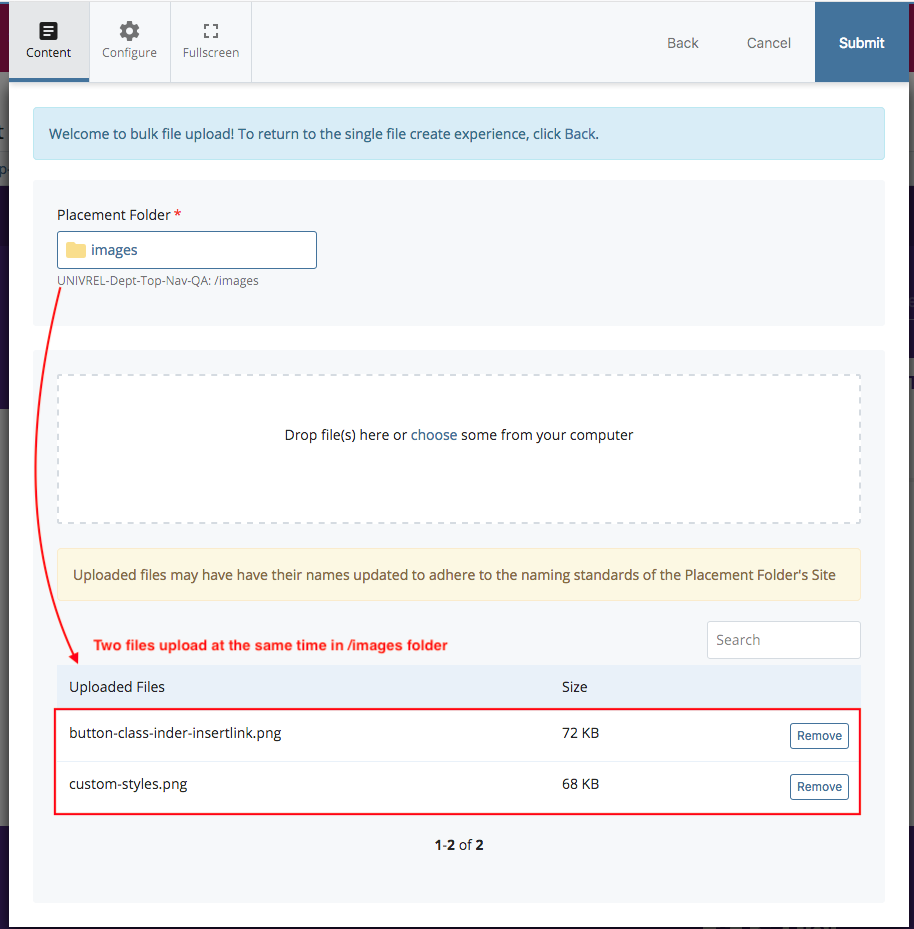
- You can either drop file(s) in the blank space or choose from your computer. If you are uploading more than one file, just drop all of the in the "Drop files" space and your pop up screen will look like the screenshot below:
- If you uploaded just one file, you'll see a preview and the dimensions of the file as shown below. You can resize the image file if you wish to, however, we recommend you crop the image file before you upload to Cascade. If you choose to resize here, make sure to click on the checkmark icon next to the image height option to apply your changes to the image.
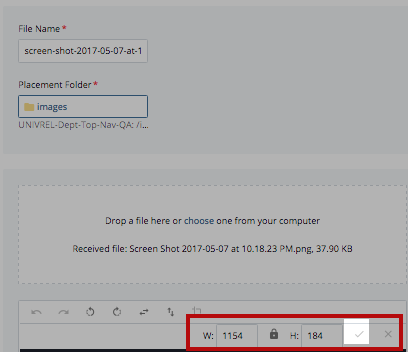
- You'll notice that the File Name field is automatically populated with the file's desktop name. You can edit it to make sure that the file name is in lowercase, without any spaces (you can use dashes). Also, make sure that the file name has appropriate file extension at the end.
- Click Save and Preview. The next screen shows you a preview of the file. This is just a draft of the file you just uploaded. If the file looks okay, locate and click Submit (appears in the tabs section).
- After you upload the file to Cascade, you can Publish it right away or publish it when you use it in a webpage.
Tips for Images and Files
- Make sure that the images you use on your website are not copyright protected.
- If you are inserting images using a file chooser, please resize them to the recommended size before uploading to Cascade. However, if you are adding images to the WYSIWYG area, you can upload images of any size. It's important to note that enlarging a small image may result in blurry images.
- Images should be saved using the "Save for Web" feature using Photoshop.
- Make sure to enter an Alt-text or Image Description where applicable.
- Name the file appropriately name before uploading it to Cascade. We recommend using all lowercase names with no spaces. We also recommend not adding year or version numbers for the files that are updated frequently.
- Generally, files should be less than 1 MB in size.
- All files that you upload to Cascade should be accessible.
- Follow instructions on Hannon Hill website to upload multiple documents and images.