Create a Group
To perform any of the tasks listed on this page, you must first click Add/Manage Events at the top right-hand corner of the PlanIt Purple home page. Log in using your NetID and password if necessary. This will take you to your dashboard.
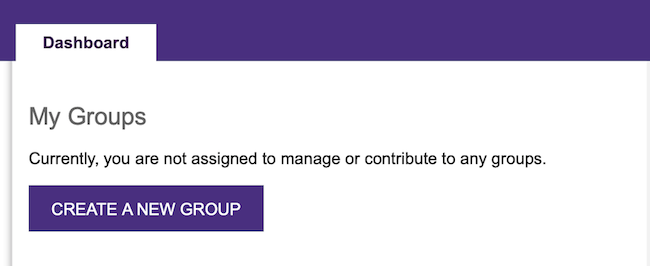
- To create a new PlanIt Purple group, click Create a New Group under the My Groups heading.
- If you are a registered student group, use the form linked from the yellow box on the page to automatically pull values in from Wildcat Connection.
- Name your group by typing its name in the Group Name field. Once you’ve named your group, a list of groups with similar names that already exist in PlanIt Purple may appear below the Group Name field. If this occurs, ensure you are not duplicating an existing group; otherwise, you’ll need to contact the existing group’s calendar contact for access.
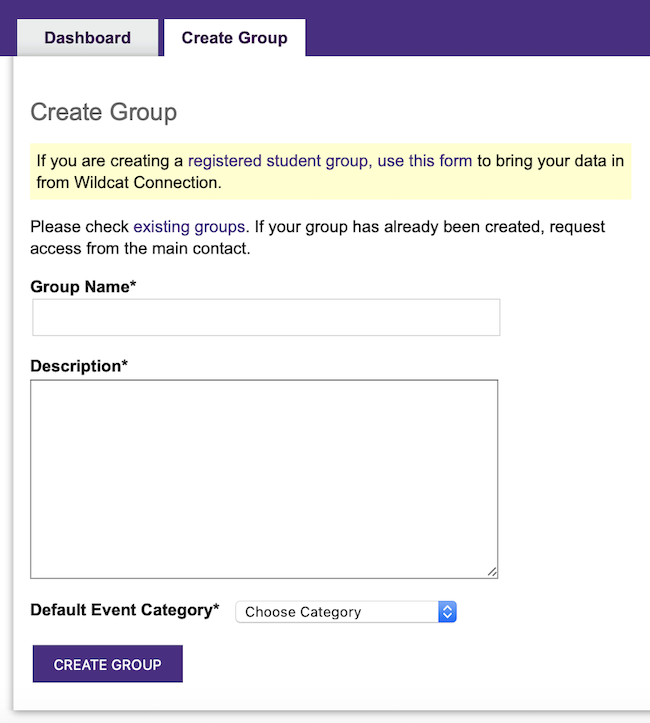
- Enter a brief Description of your calendar/group here.
- Choose a Default Event Category from the drop-down menu below the description field. This will pre-populate the category for events you create, however you may still specify categories and sub-categories on an individual basis.
- Click Create Group.
- Click the Dashboard tab to see a page listing the groups you administer. The group you’ve just created will be listed on this page. From the Dashboard, you can create events in PlanIt Purple and control administrative options for your group.
Now that you've created a group, visit the events section to learn how to add events and how to modify the events you've added.