Add Events
Add a Single Event
- Go to PlanIt Purple Homepage.
- Click the Add/Manage Events button.
- Under the My Groups heading, locate the group hosting the event. If you do not see the group, you must either create a group or submit a request to become an editor.
- Click Add An Event.
- Fill in each field as appropriate. Under When & Where, click on Single Time to create a single event.
- Click Submit on the bottom of the page once you are done entering all the information. We recommend you provide as many details as you can. Your event will post to PlanIt Purple immediately.
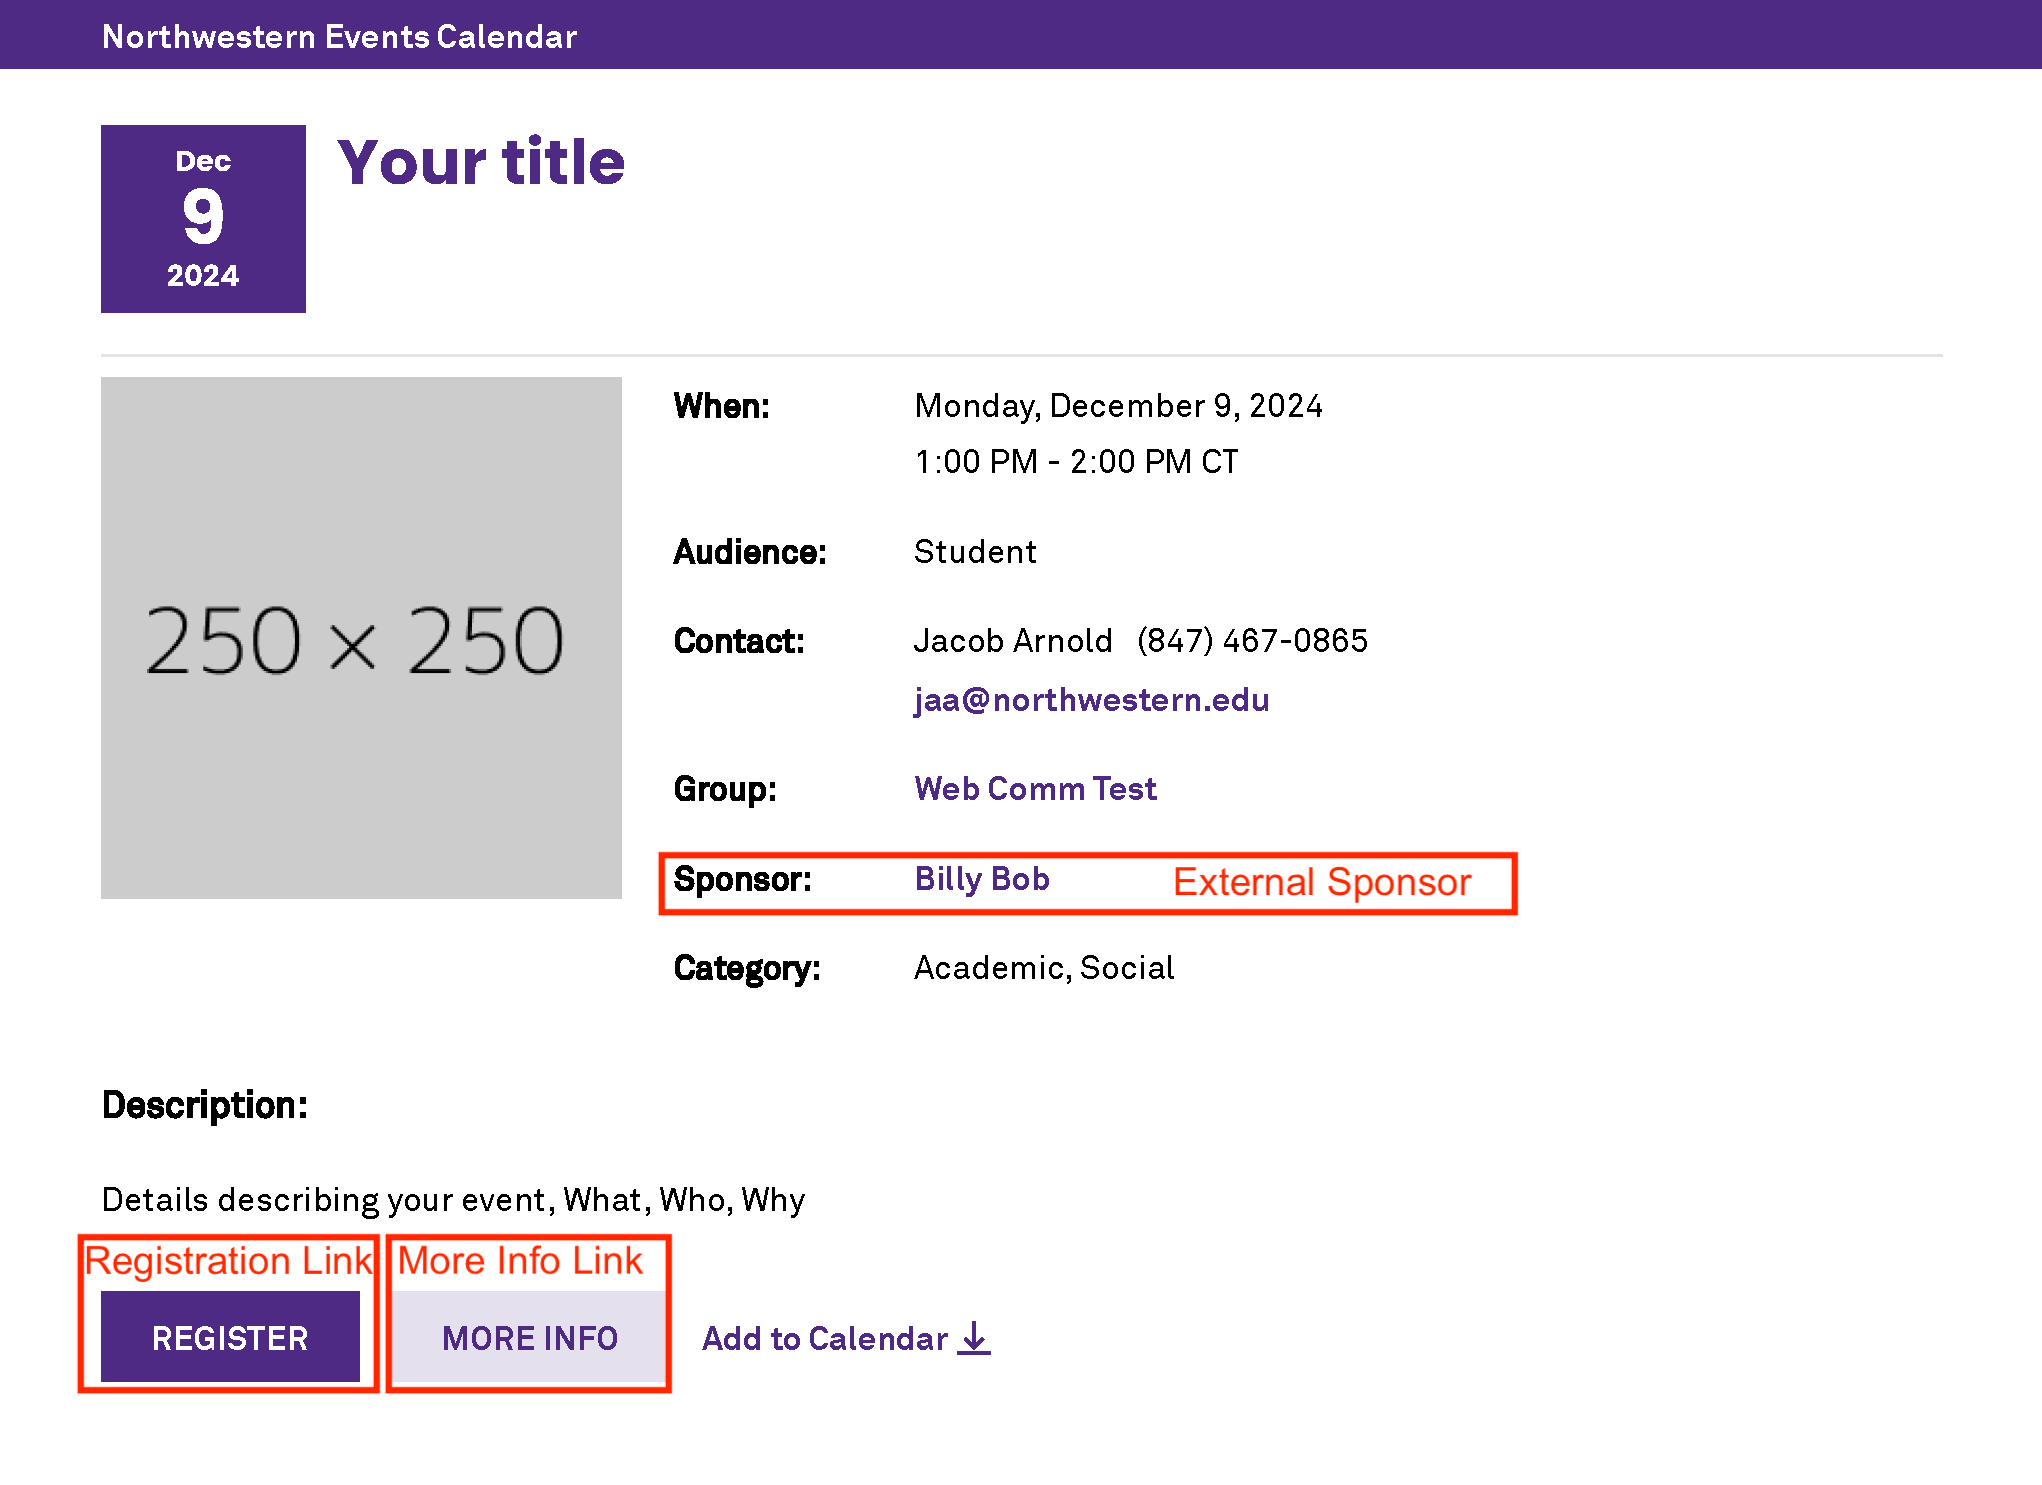
Review the example event below to see how your event details will be displayed.
Add a Recurring Event
- Go to PlanIt Purple Homepage.
- Click the Add/Manage Events button.
- Under the My Groups heading, locate the group hosting the event. If you do not see the group, you must either create a calendar or submit a request to become an editor.
- Click Add An Event.
- Fill in each field as appropriate.
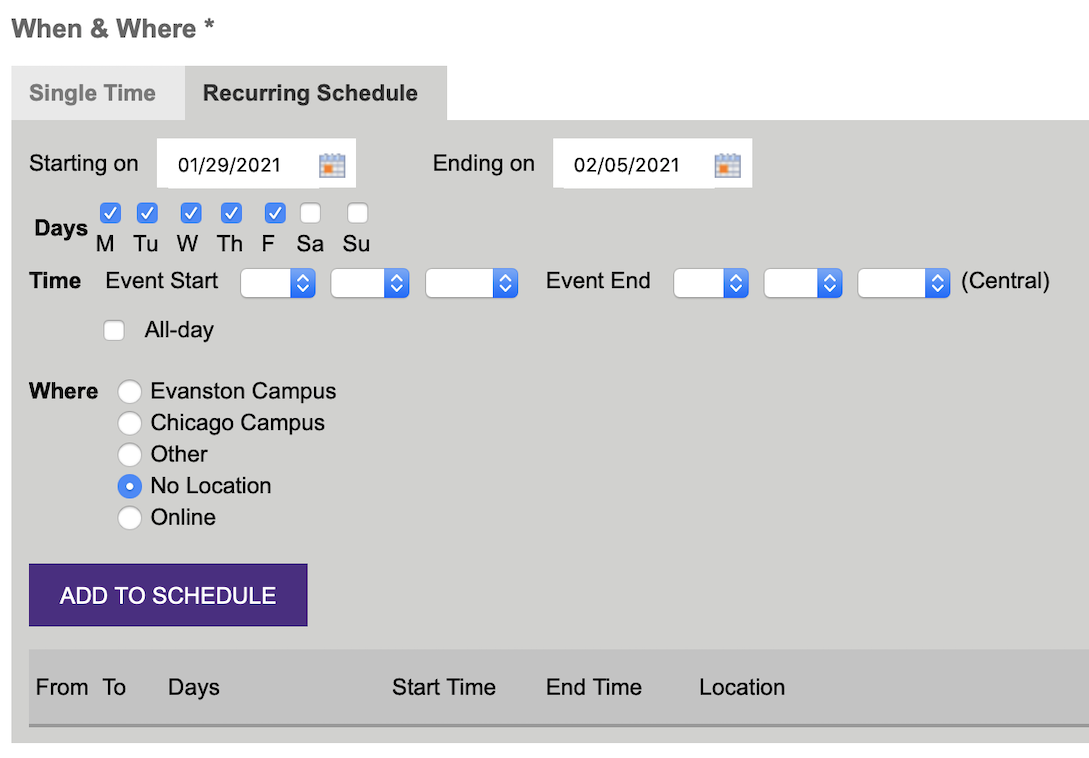
- Under When & Where, click on Recurring Schedule to create recurring events. Make sure you add event occurrence by clicking Add To Schedule.

- Once you are satisfied with the event information, click Submit on the bottom of the page. Your event will post to PlanIt Purple immediately.
Biology of an Event Post
Once you've completed the "Add an Event" form, your event pages will be automatically generated with all the details you've provided.
Take a look at the image below to see how your input is organized.
Note: The "Registration Link" and "More Info Link" fields appear as buttons, as highlighted below.
