Fostering an accessible, inclusive, and usable digital environment is every instructor, teaching assistant, and support staff content creator's responsibility. Your mission, should you choose to accept it, is to improve the accessibility of your Canvas course site by completing the Mission: Accessible challenge.
What is the Mission: Accessible Challenge?
Mission: Accessible is a guided program to help you make your Canvas course content accessible for all students. When you sign up for Mission: Accessible, you will work through the seven key accessibility areas listed below in your Canvas courses. This work will help improve existing course content while reinforcing skills that you can apply in future courses.
Once you've begun the challenge, we will send you an email every two weeks asking you to update us on your progress. If you are ever feeling stuck, there is a link in the check-in email that you can use to book a time to connect with the project team for an individual accessibility consultation.
We recommend starting with one or two Canvas courses for remediation in Mission: Accessible. We invite you to sign up again in future quarters to work on your other Canvas courses in hopes that all of your Canvas courses will be fully accessible within a year.
Two final things to note before signing up:
- The current challenge will not include a review of the documents attached to your site (that's coming later).
- The enrollment form requires NetID authentication to access. When you complete the form to sign up for the challenge, it will ask you to approve your account's connection with SharePoint. This approval step is expected and necessary to track progress so please be sure to click "Approve" when prompted.
Join the Mission: Accessible Challenge
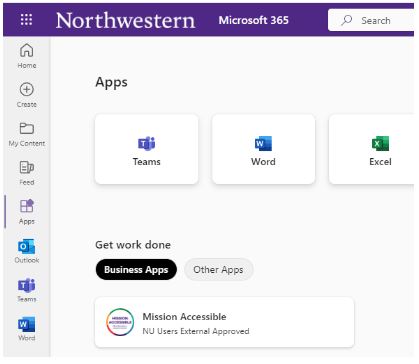 If you make progress, you don't need to wait for the check-in email to update your progress. At any time, you can update us on your progress by logging in to the Office 365 Web Portal, selecting "Apps" in the left-hand global navigation bar, and clicking the tile for Mission: Accessible.
Remember, we are here to help you successfully complete Mission: Accessible so contact us any time you have questions or need assistance.
Is it for me?
Each challenge is developed for people of all levels of digital accessibility knowledge. You do not have to be a Canvas expert or know HTML to be successful. By participating in the challenge, we will help you break down the big project of digital accessibility into smaller, doable chunks.
Why do this?
Digital accessibility is a responsibility shared broadly across our campus community. Ensuring that your Canvas content is accessible benefits all students, but especially impacts students with disabilities who rely on accessible content they can use for their learning.
As you complete individual challenges, be sure to log your completion. When you've completed the entire challenge, a consultant will review your courses and provide a certificate of completion. You and your course will also be displayed on the Mission: Accessible Wall of Fame, your Dean and Department Head will be notified that you successfully completed the challenge, and you will be provided with language to use in your course description to let students know that your course content has been designed with accessibility in mind.
Headings Challenge
When you have completed this challenge
You will have a Canvas course that can be easily navigated by all, including screen reader users.
Often, without realizing the inaccessible aspect of it, people create "headings" by changing the text characteristics of the heading text. This includes increasing font size and/or bolding or underlining the text. Unfortunately, this is inaccessible. Using the formatted heading structure within Canvas is important for a couple of reasons.
- Headings help break up your page so that all readers can scan the page and find sections or subsections that are important to them.
- When formatted heading structures are used, screen reader users can listen to headings on a page and jump directly to sections that they want to read.
Please view the Canvas headings page for more on why headings are important, how to implement them and what to avoid.
Challenge
For this challenge, you will look at all pages in your Canvas course(s) and add proper heading structure.
- Step 1: Find all of the headings on each page and make sure they are properly identified as a heading within the rich content editor.
- Step 2: The main sections of each page should be Heading 2's with any subsection heading being properly nested, similar to an outline. Make changes as necessary to fit this convention.
Visit the Northwestern Accessibility site's page on adding headings in Canvas for more on best practices around headings.
Tip
The Pope Tech Accessibility Guide will flag if there are no headings on the page as well is if they are out of order. Use the Headings Outline button to view your headings in an outline format to ensure they are structured properly.
Links Challenge
When you have completed this challenge
Your course will have meaningful hyperlinks for all linked materials helping users understand where the link will take them.
When adding links to a page, many people either post a complete URL or a hyperlink with text such as "Click here," "Read," "More Info," etc. Either of these can make it difficult for any user to know where the link will take them. For screen reader users, listening to full URLs is long and cumbersome. Imagine listening to a long line of numbers and letters being read out loud! Having hyperlinks without meaningful text affects a student's ability to navigate around a page by removing their ability to listen to a list of links and choose where to go.
A more meaningful hyperlink could look like changing a hyperlink from "Read" to "Read Chapter One of Jones."
Challenge
For this challenge, you will look at each page in your Canvas course and add meaningful hyperlinks to linked material.
- Where you have full URLs, replace the full URL with meaningful text.
- Where you have hyperlinks such as "Click here," "More," etc., change the hyperlink to meaningful text that helps the user know where the link will take them.
- Where you have the same hyperlink text multiple times on the page, but the links go to different pages, keep the hyperlink text for one, but change the others to ensure unique hyperlinks throughout the page.
Visit the Northwestern Accessibility site's page on creating accessible links in Canvas for more on best practices around links.
Tip
Adjusting links is a manual process. The Pope Tech Accessibility Guide will flag improper hyperlink text as "suspicious link text." Although you can fix these issues within the accessibility guide, it is easier to rewrite sentences in the rich content editor to include proper link text.
Alternative Text Challenge
When you have completed this challenge
All images in your course will have descriptive alternative text so that all users will know what the image portrays.
A lack of alternative text on images is the most common accessibility error in Canvas materials, yet it is often one of the easiest to fix. Alternative text is a text description given to an image that shares the information that the image is portraying to someone who can't see it. All images, unless they are purely decorative need to have this description available. Often images have either no alternative text or simply use the file name, both of which cause accessibility issues. Imagine the different experience between a student who can see a diagram you've uploaded versus someone who is given the information "diag1.jpeg."
Challenge
For this challenge, you will make sure that each image in your Canvas course either has concise, descriptive alternative text or is marked as decorative. Common examples of decorative images include icons that repeat information available in text, decorative lines on a page, etc.
- On each page where there's an image, put the page into edit mode.
- Use the Canvas Accessibility Checker to determine if there's an alternative text error.
- When an error occurs, if the image needs a description, write the description where prompted.
- When an error occurs, if the image adds nothing to the page and is purely decorative, indicate such by checking the decorative image box.
Visit the Northwestern Accessibility site's page on alternative text in Canvas for more on best practices around adding alternative text to images.
Tip
The Pope Tech Accessibility Guide will flag alternative text issues if there is no alternative text, if the alternative text is a file name, or if the words "image," "graphic" or "picture" appear in the alt text. It's always good practice to check images that don't get flagged to make sure that they have appropriate alternative text.
Tables Challenge
When you have completed this challenge
All tables in your course will contain a row and column header for more accessible navigation as well as a description.
There are two common issues with tables that cause accessibility issues.
- Some use tables within Canvas as a formatting tool. Tables should only be used to display data.
- When tables are used to display data, they should have identified row and column headers. This will allow screen reader users to hear the title of the row and column as well as the data in the cell so that they can effectively use the table.
Tables should also include a brief description of its contents.
Challenge
For this challenge, add row and column headers to any table that you have in your course
- On pages with tables, run the Canvas Accessibility Checker.
- When a table without a caption is identified, add the caption as prompted.
- Add a header row, column or both as appropriate when prompted by the accessibility checker.
Visit the Northwestern Accessibility site's page on tables in Canvas for more on best practices around designing and using tables.
Tip
If you use a table to format the look of any of your Canvas pages, that will need to be changed in the next iteration of your course. Use one of the Mission: Accessible templates that provide accessible formatting options for your course next quarter to get rid of the inaccessible table formats.
Color Contrast Challenge
When you have completed this challenge
All text in your Canvas course will have sufficient contrast with the background so that it can be clearly viewed by all sighted users.
Inadequate color contrast between text and the background on a Canvas page and make the page difficult for many users to read. For the most part, if you are putting black text on a white background, you will not have these issues. However, any change in color of either the text or background should be checked to ensure an adequate contrast of 4.5:1.
Challenge
For this challenge, you will make sure that all text in your Canvas course has an adequate color contrast from the background.
- On each page where you use something other than black text on a white background, run the Canvas Accessibility Checker.
- When a contrast error is identified, choose another color as prompted. If you'd like to test the contrast ratio of two colors before use, you can use the WebAIM color contrast checker.
Visit the Northwestern Accessibility site's page on color contrast in Canvas for more on best practices use of color in your course.
Tip
You should avoid using just a change in color to signify something important in text. Even with adequate color contrast, someone who is colorblind may have difficulty recognizing the change in color. When signifying a change with a new text color, add something else such as an asterisk as well.
Lists Challenge
When you have completed this challenge
All of the lists in your course will be properly formatted to make your page easier to read in general and easier to navigate by a screen reader user.
Lists are a good way to break up walls of text on your page, group like things, or display a process. A common mistake when making lists is to type the number one and then the first item in the list, followed by the number 2 and the second item in the list, and so on. Visually, this looks correct, but this is not technically structured as a list. This is true for numbered lists, bulleted lists, and any other list type.
Challenge
For this challenge, you will properly format all lists on your Canvas course.
- Run the Pope Tech Accessibility Guide on any page that contains at least one list.
- If the test indicates that there is something that should be formatted as a list, check to make sure that you intend that to be part of a list.
- If so, choose the "format as list" option.
Visit the Northwestern Accessibility site's page on lists in Canvas for more on best practices around using lists.
Tip
To avoid false positives in the Canvas Accessibility Checker, you can simply highlight anything you want in a list on a page and click the list format option in the Rich Text Editor.
Video and Audio Challenge
When you have completed this challenge
All video and audio that you have recorded on in your Canvas course will have captions and/or transcriptions.
Captions on videos have benefits that extend beyond providing a means for those with hearing impairments to access information. As automatic speech recognition has improved, it has become easier to add captions to videos, which has led to many more videos online having captions than they did even a few years ago. Although automatic captions have gotten better, they are not perfect and to be accessible, you'll need to ensure accurate captions on videos that you post.
Challenge
For this challenge, you will edit the captions on at least one video and agree to edit captions before posting new videos.
- Identify one video that you recorded and posted to your Canvas site.
- Open that video in the tool you used for recording (Panopto or Zoom).
- Edit the captions for accuracy.
- Replace the video in the Canvas course with the video with updated captions.
- Identify videos from outside sources used in your course. If they do not have captions, look for similar videos that do and replace them.
Visit the Northwestern Accessibility site's page on videos and audio in Canvas for more on best practices around captioning and transcripts.
Note
Editing captions for videos can be time consuming. Teaching and Learning Technologies offers support for captioning if you need help correcting your inaccurate captions.
Tip
Going forward edit the automatic captions prior to posting the recording to Canvas. Doing this immediately and one at a time makes this process less overwhelming than trying to edit captions for several videos. Also, if you have a script for your video, that can be uploaded and used as captions.