Swapping Classes
To enroll, you can either add or swap classes. The Swap Classes feature allows you to exchange one course (in which you are currently enrolled) for another (in which you are not yet enrolled). The system will only swap courses if you are able to enroll in the new one—that is, if there is class space available, and if it’s your registration time. You can also use the swap or edit features to change lab and discussion sections for a course in which you are already enrolled.
Step 1
Navigate to the CAESAR login page, and sign in using your NetID and password. Your Student Homepage appears.
Step 2
To swap a class in your schedule, click on the Manage Classes tile on your homepage. The NU Manage Classes page appears.
Step 3
Select Swap Classes from your left-hand menu. The Swap a Class – Select a class to swap page appears.
Step 4
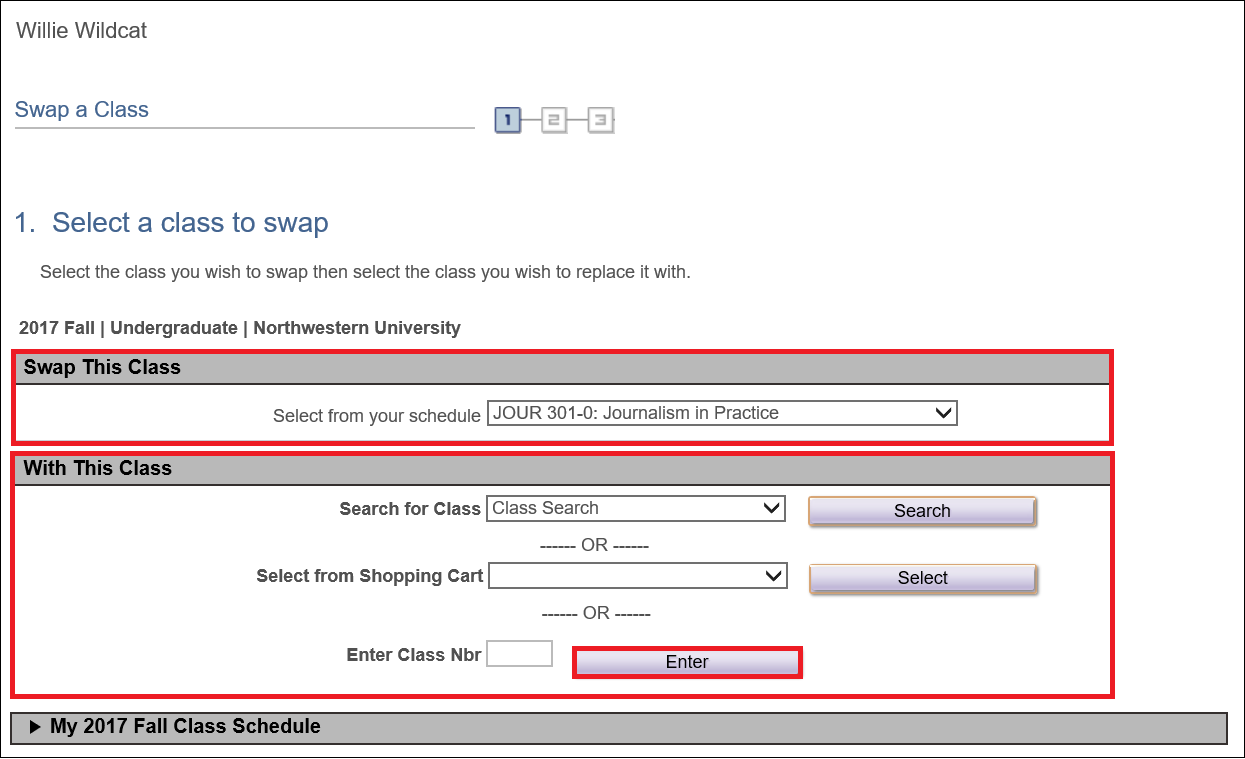
Select from your schedule a class that you wish to drop (swap out of) in the Swap This Class box.
Step 5
Next, enter the 5-digit class number and press Enter (or, search for the desired class you wish to enroll in/swap into). The Swap a Class – Select a class to swap - Enrollment Preferences page appears. (Note: if the class does not have a related component(s), such as lab or discussion section(s), skip to step #7 below.)
Step 6
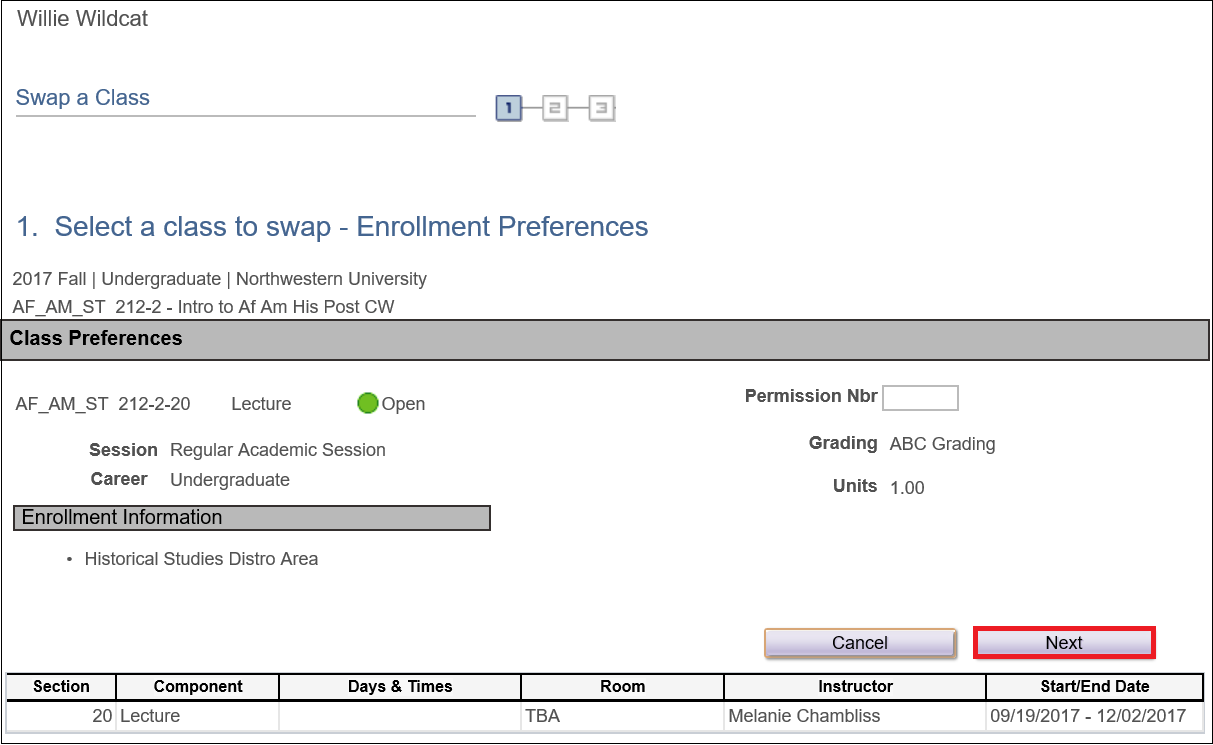
Select the section(s) you want and press Next. The Select a class to swap - Enrollment Preferences page appears. [Note: You must register for discussion or lab sections with the lecture. You cannot register for labs and discussion sections independently.]
Step 7
Review your Enrollment Preferences and press Next. The Swap a Class – Confirm your selection page appears.
Step 8
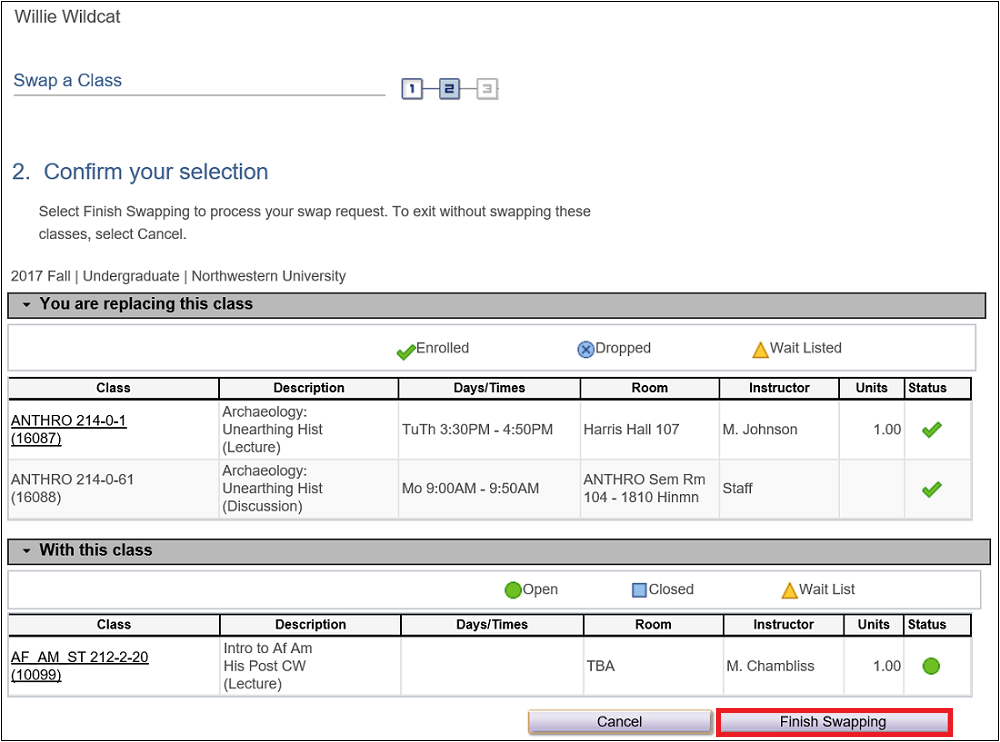
Press Finish Swapping to process your swap request. (To exit without swapping these classes, press Cancel).
Step 9
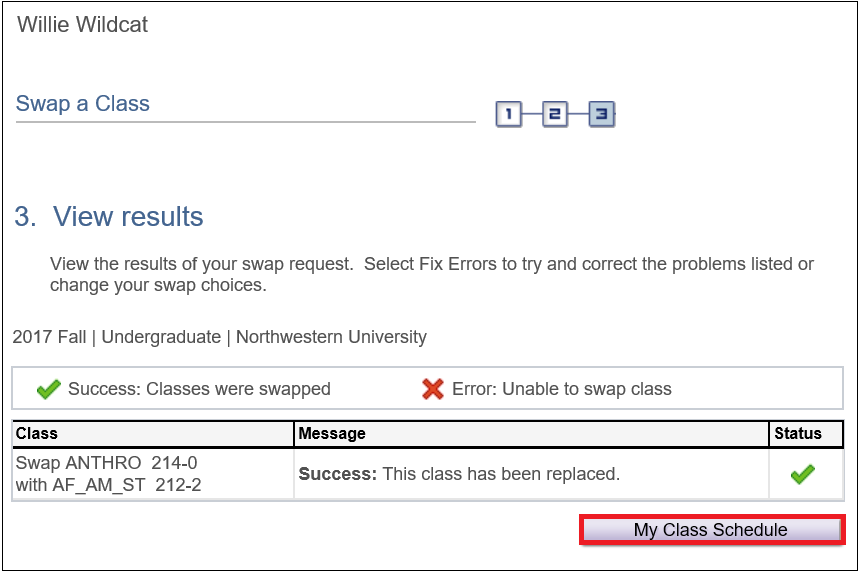
When your transactions have been processed, the Swap a Class–View Results page appears. Successful enrollments will display a green checkmark next to the class, and unsuccessful enrollments will display a red X. If a class addition or swap is unsuccessful, Errors will be displayed in the Message field.
Step 10
Press My Class Schedule to view and print a copy of your class schedule. Confirm that your schedule is correct and press the Printer Friendly Page link in the lower right hand corner and then print a copy if you wish. [Alternately, you can click on View My Classes in your left-hand menu to view your class schedule.]