Adding Yourself to a Waitlist
The CAESAR waitlist feature is available for select classes in departments and schools throughout the University. Students may add up to two classes to their waiting list.
Step 1
Navigate to the CAESAR login page and sign in using your NetID and password. Your Student Homepage appears.
Step 2
Click on the Manage Classes tile. The NU Manage Classes page appears.
Step 3
Click on "Shopping Cart and Enroll" from your left-hand menu. Enter a 5-digit class number in the Class Nbr field provided and press Enter (or press Search to access the Shopping Cart – Enter Search Criteria page to search and select a course). Note: when searching for classes, if you uncheck the “show open classes only” checkbox, the search returns classes that have an Open, Closed or Wait List status.
Step 4
Select related class section(s) if necessary. If not necessary, go to the next step. [Note: You must register for discussion or lab sections with the lecture. You cannot register for labs and discussion sections independently.] If the class has no related sections or if you’ve just selected a related section, the Add Classes-Select classes to add - Enrollment Preferences page appears.
Step 5
Determine whether the class offers an online waitlist. If the yellow triangle ( ![]() ) appears next to the section you wish to add, the department has chosen to use the CAESAR waitlist.
) appears next to the section you wish to add, the department has chosen to use the CAESAR waitlist.
Step 6
Click on the Wait List if Class is Full checkbox to be on a waitlist if the course is full and maintains an online waitlist. Select any additional enrollment preferences. To go to the next step, press Next.
Step 7
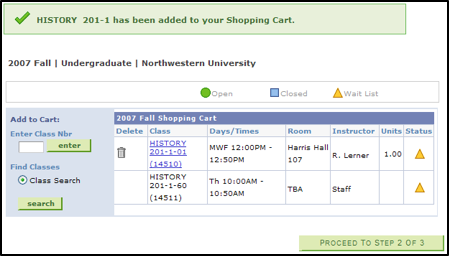
You have now successfully added this class to your shopping cart and have returned to the Add Classes–Select classes to add page, which now displays a message similar to the following and the contents of your shopping cart.
Step 8
Repeat the steps above to add additional classes to your Shopping Cart or press the Proceed to Step 2 of 3 button to move to the confirmation stage of the enrollment process.
Step 9
The Add Classes–Confirm Classes page displays the classes you’ve selected from your shopping cart to add at this time. Confirm your selections and click Finish Enrolling.
Step 10
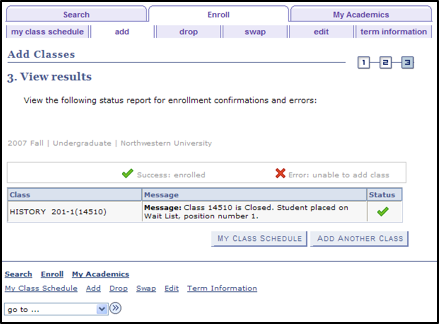
When your transactions have been processed, the Add Classes–View Results page appears. Enrollments that have been successfully added to the waitlist will display a green checkmark next to the class and a Message stating that the “class is closed. Student placed on Wait List, position number 1.” to indicate your place on the waitlist. Unsuccessful enrollments will display a red X next to the class. If your request is unsuccessful, Errors will be displayed in the Message field.
Step 11
Press Add Another Class to add another class, or press My Class Schedule to view and print a copy of your class schedule. Confirm that your schedule is correct, press the Printer Friendly Page link in the lower right hand corner and then print a copy if you wish. [Alternately, you can navigate from the Main Menu by selecting Enrollment > View My Class Schedule.]
Once a department selects you to enroll in the class, someone will email you a permission number with instructions to move from the waitlist onto the fully enrolled class list.